Description
The CO2 laser cutter is a 2 axis machine capable of cutting materials fast and accurate. It is using the energy of the light to burn trough parts. These machines are commonly used in any type of industry.
Context
Since 2017 I regularly use my 3D printers. This production method is really convenient because it can print complex shapes out of plastic. However, 3D printing is using an additive process, that’s why it is time consuming.
The laser cutter on its side is way faster, the job can be done in a matter of minutes.
The CO2 laser cutter is using an infrared laser beam capable of burning materials such as wood, plastic, fabric, leather and so on.
Steps
Before starting anything, I asked myself a few questions.
What laser technology should I go with?
Yag Lasers
YAG is a crystallin solid which acts as an amplifying medium when a current flows through. This type of laser can be channelled in an optic fibre where as a CO2 laser beam can’t be. YAG lasers can be controlled really accurately, they are also used for eye surgery as well as steel cutting.
Fibre Lasers
Fibre laser is using rare earth ions in an optic fibre and this acts as the amplifier. Apparently, Fibre lasers have a higher output power, there for they can cut through thicker materials.
Diode Lasers
Diode lasers are generated thanks to a semi-conductor creating a monochromatic light. These are usually not powerful (a couple of watts). They can be found in CD engraver or also in optical communication systems such as optic fibre.
CO2 Lasers
CO2 laser is one of the most common technology used for this application because of their large power spectrum going form milliwatt to hundreds of kilowatts.
It is using a mixture of CO2, Azote and helium, and when we apply a couple thousand volts to it, it creates a laser beam.
The beam is then amplified thanks to tow mirrors.
In my application, the CO2 laser is the best compromise between cost and power.
They are relatively simple to use and to install.
The only downside, is all the adjustments that have to be done with the mirrors.
How much power do I need?
I want to be able to cut through wood (mainly plywood and MDF) and plastic (acrylic and Plexiglas). I also want to cut a decent depth in to the material (3 to 5mm). An other parameter to keep in mind is the cost, it starts at around 150 euros for a 30W laser and goes up to thousands of euros.
I figured out that a 40W laser tube will respond to my expectations. I can always upgrade it if I think it’s not powerful enough.
What size do I need?
The working surface is depending on the kind of parts that has to be done, the budget and also the storing space. Since my bedroom is my workshop, I don’t have a lot of storage room, but I managed to find a place under my bed.
In my case the machine should not exceed 1,2m by 80cm wide. From now on I can measure the working area according to the components I use. I measured 80 by 40cm.
The table the machine sits on
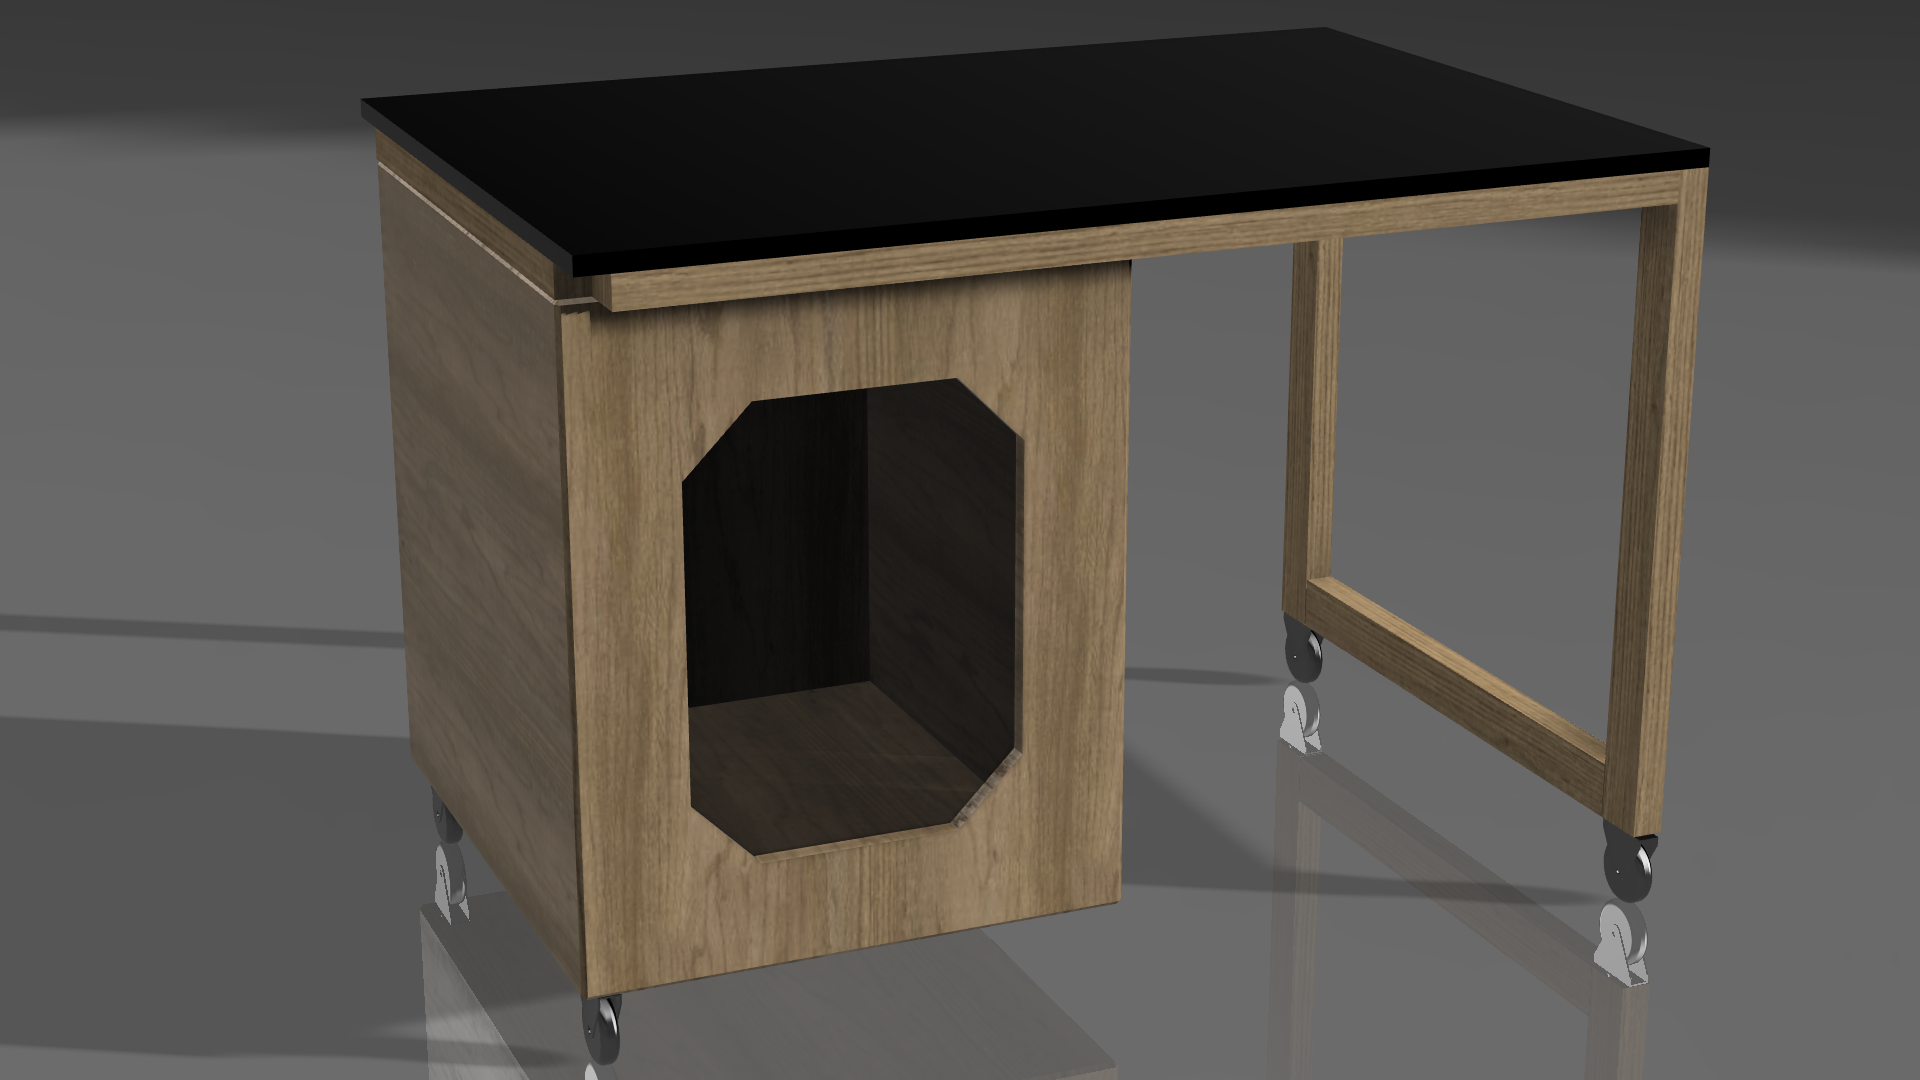
As said before, I want to optimize the storage area as much as possible in my workshop. There for, I made a wooden table that can fit perfectly under my bed.
The frame is made out of 2 by 4 inches wood lambers and the table top is made out of a centimetre think MDF sheet. I also had a 3D printer enclosure laying around, so I included it into the table frame. The frame should be as straight and sturdy as possible to prevent any miss alignment in the future.
The frame and motions
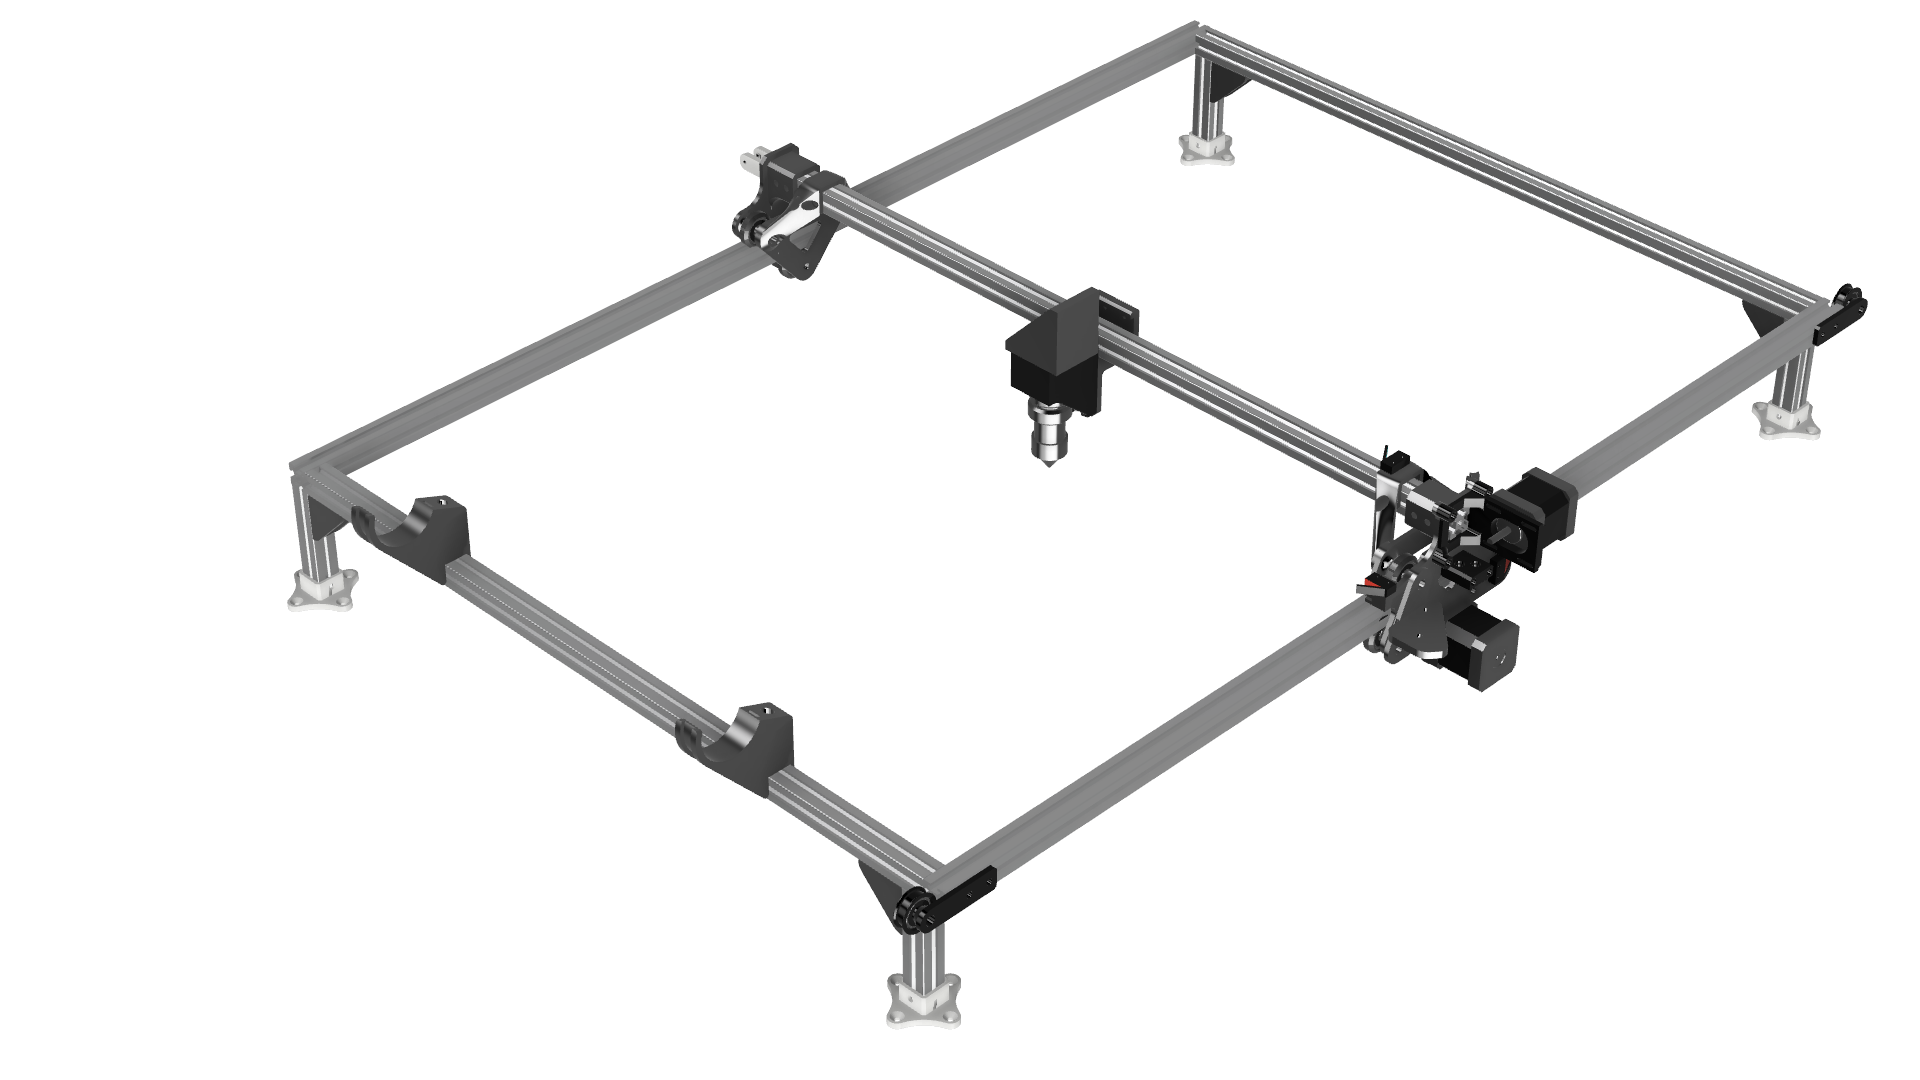
A laser cutter can be a 2 or a 3 axis machine. In my case, I chose 2 axis because it is less complex to deal with and it works just fine. The third axis can be used to adjust the distance between the laser nozzle and the material we want to cut.
The two axes are for the X motion and the Y motion. The laser head can travel along these two axes. It creates a 2D motion.
In order to control these two motions, I need two motors. I went with stepper motors (commonly used in 3D printer, CNC machines…). These motors are fast, quiet and simple to use.
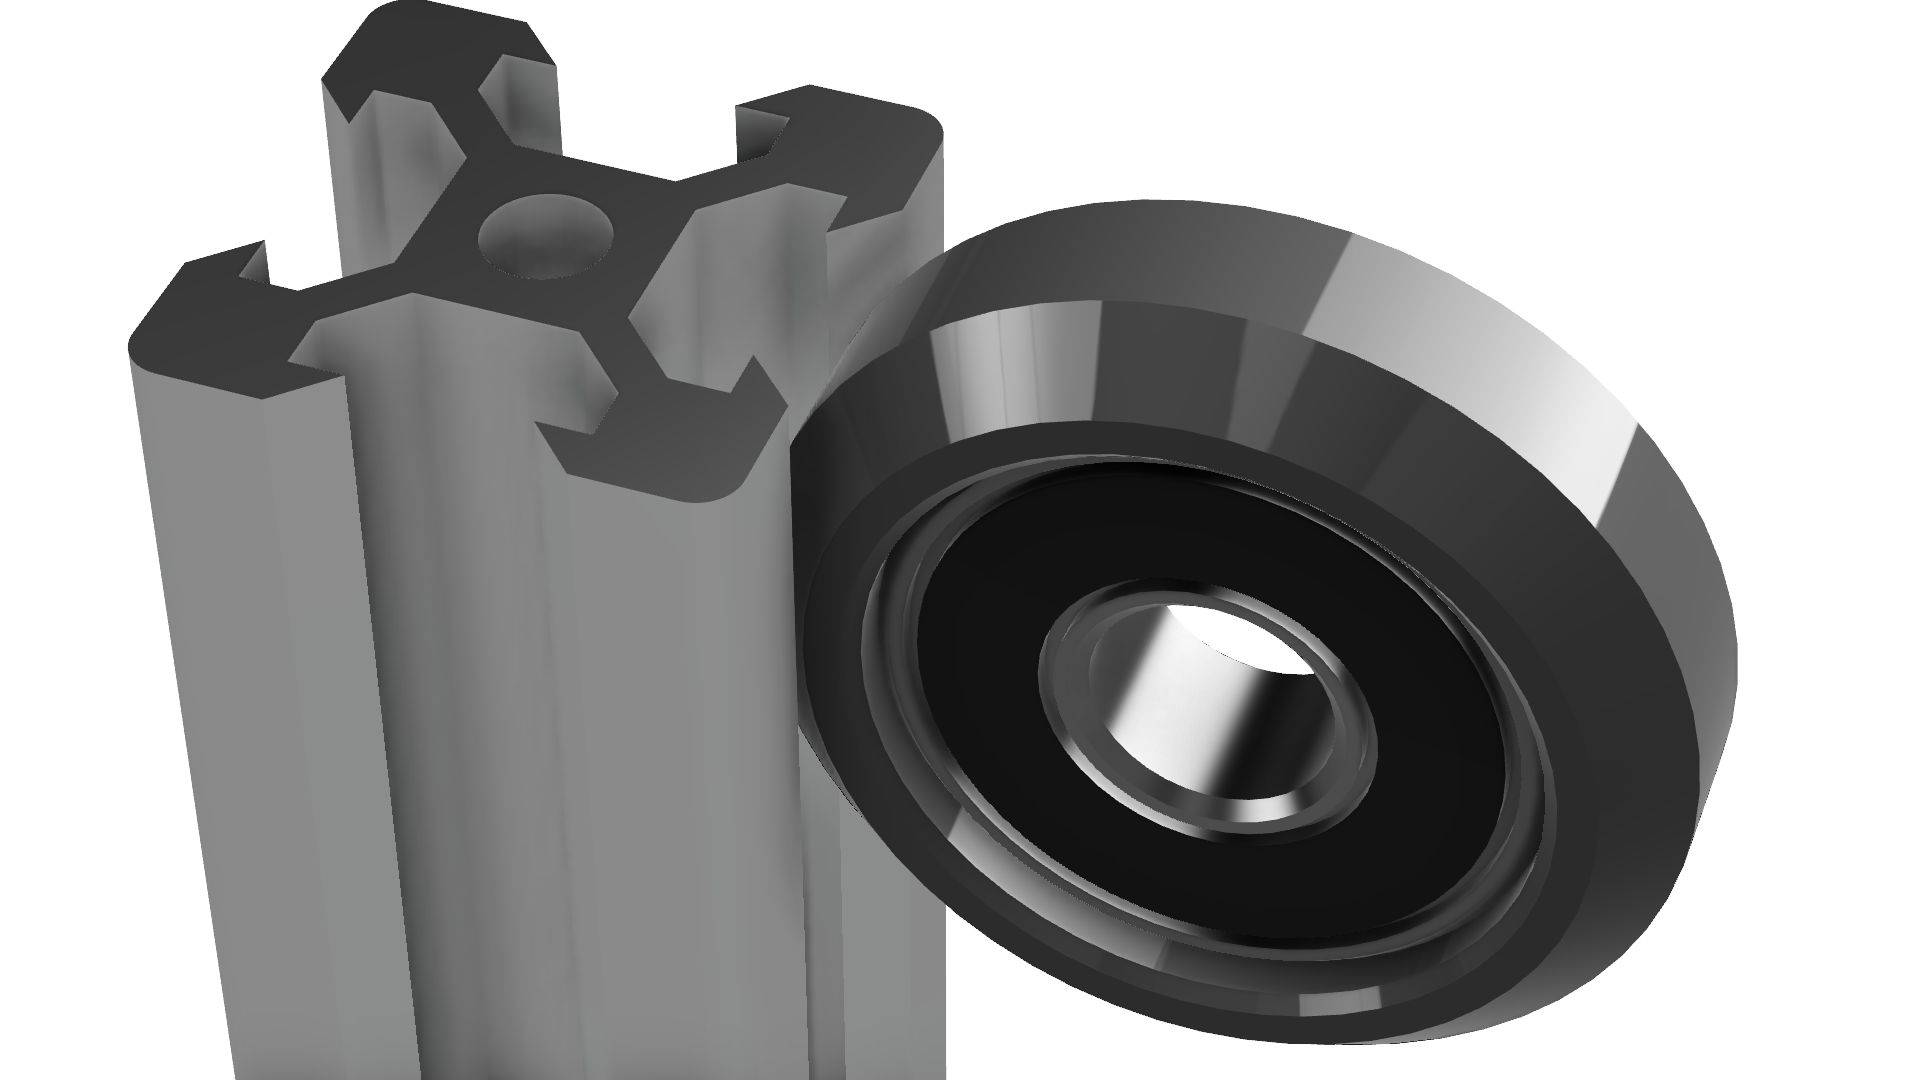
For the main frame, I chose V-slot aluminium profiles since they are the most modular option I can think of. The modularity leaves room for upgrades in the future. It is possible to assemble them easily thanks to T-slot bushings and fittings. V-slot aluminium profiles can also be used as linear guides because of their V shape. Then we use what I call V-bearings to slide on the aluminum profile:
I created a design on Fusion360, bought all the required parts, and assembled it. Once again, the frame has to be square to prevent from any misalignment problems.
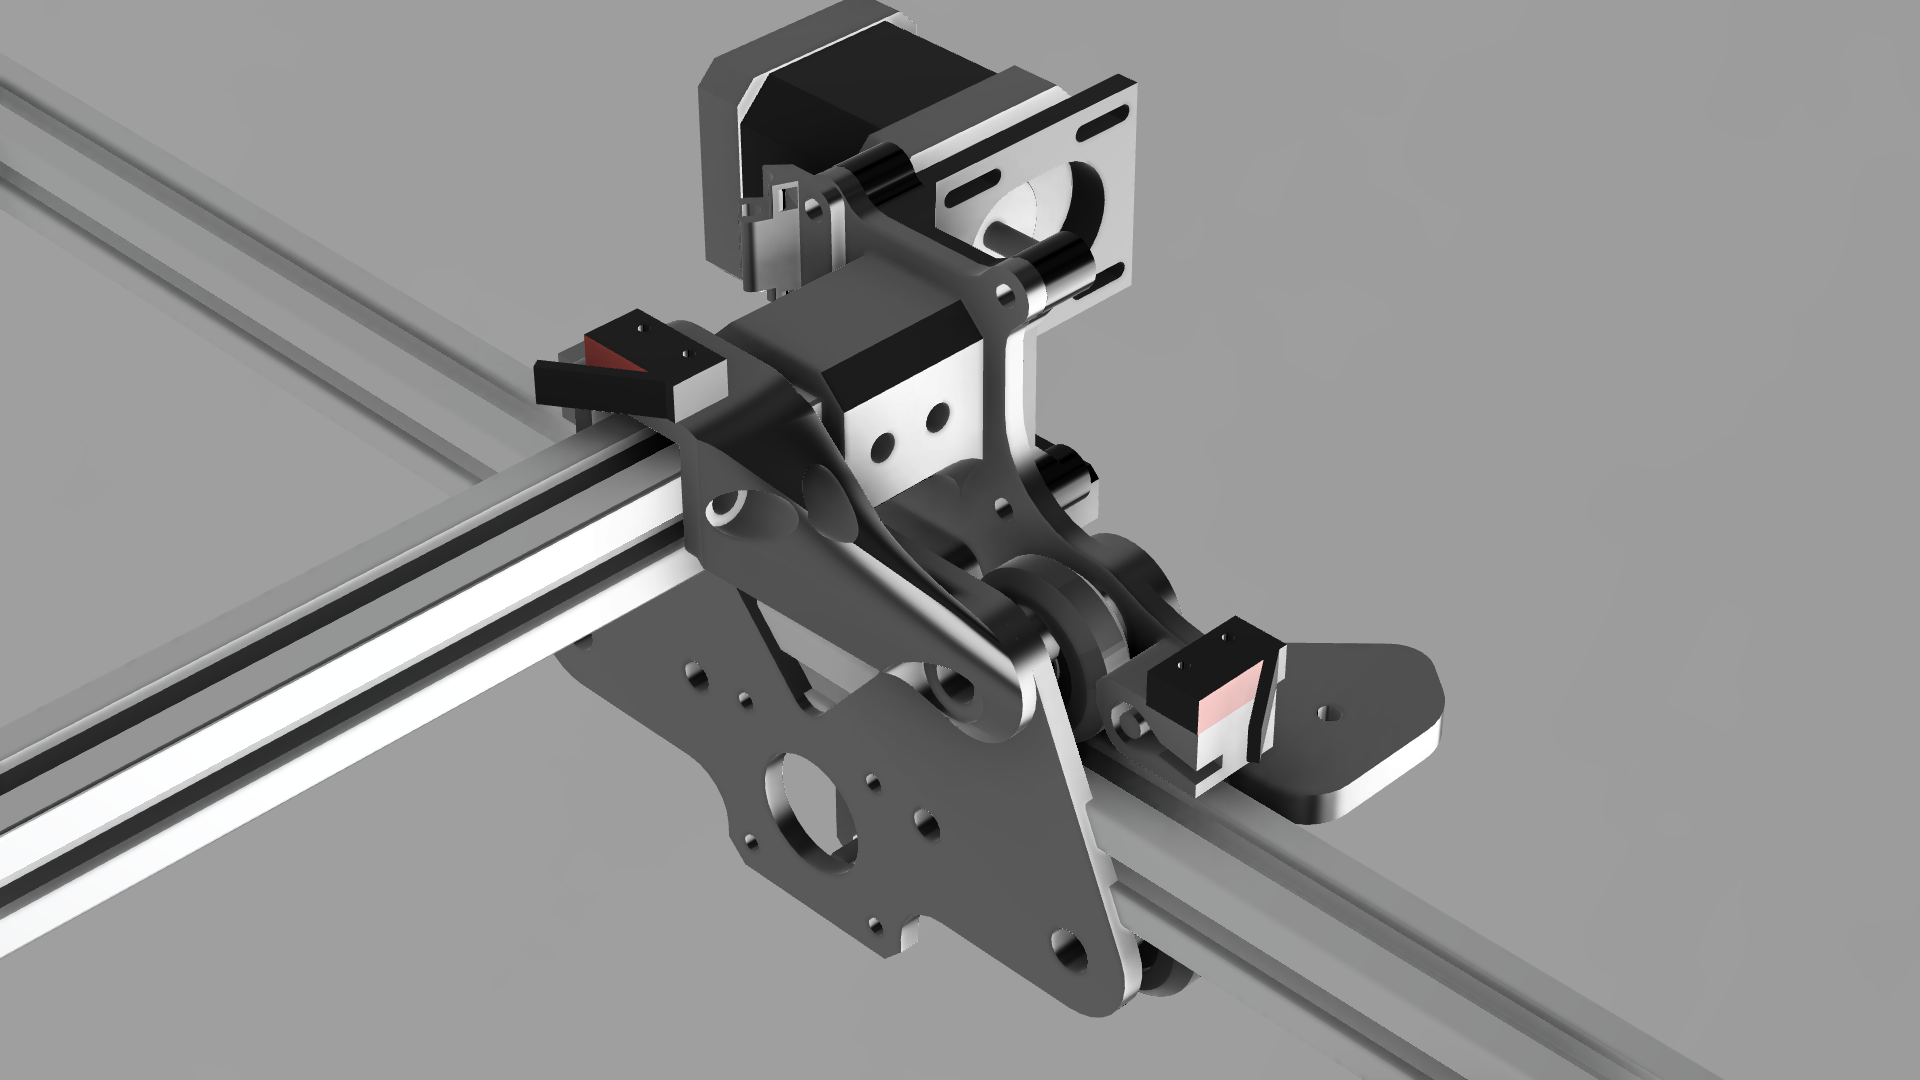
I tried to 3D print all the parts that could be printed to keep it low on budget. For example, the both sides chariots on the Y axis have been 3D printed.
Laser and mirrors
First let’s see how a CO2 laser tube is working:

At each end of the tube there is a mirror. On one side it is a regular mirror that reflects all the light. And on the other side it is a semi-mirror. This system amplifies the beam, and when the light exceeds an amount of energy, it crosses the semi-mirror and exit the tube.
The beam is going straight out of the laser tube. Now the beam has to be redirect to the laser head. At this point, the easiest solution would be to use an optic fibre. Optic fibres can’t accept the CO2 laser wave length. That’s why I used ceramic coted mirrors. Here is schematics of how it is working.
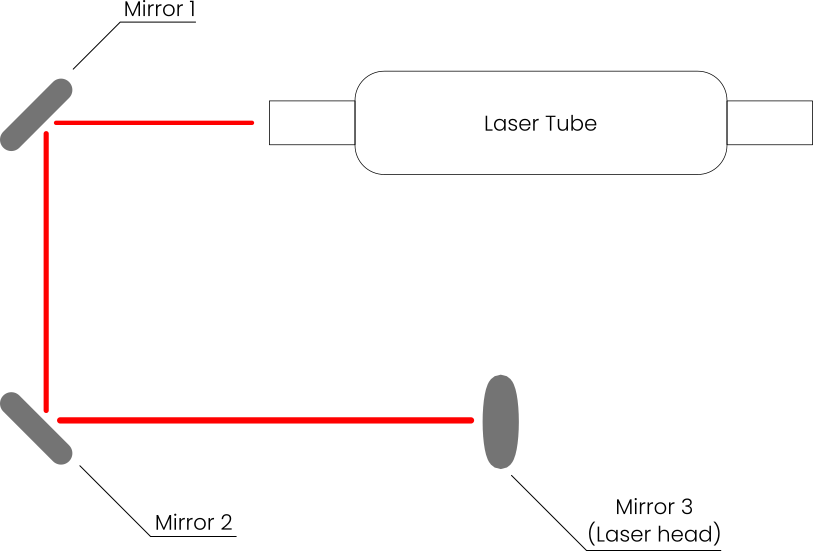
As any electrical component, there are losses. In this case, the losses are creating heat so the tube has to be cooled down. There for I used a water pump and a radiator to dissipate the heat.
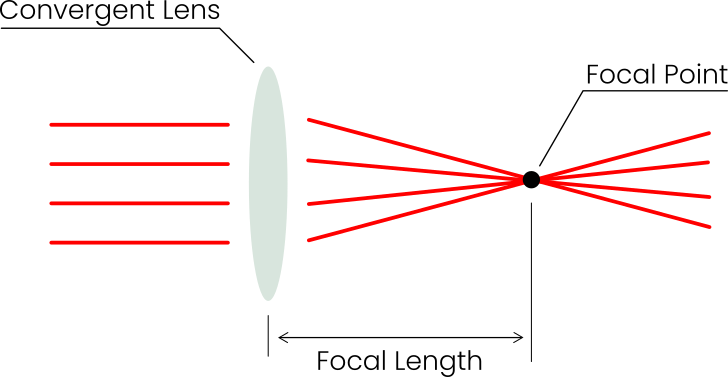
A laser beam is a group of multiple lasers going parallel. In order to maximise the energy on the cutting point, we use a convergent lens. Its job is to group all the parallel beams in one single point. This point is named the focal point and depending on the focal length, the distance between the focal point and the lens can change. I used a lens with a 38.1mm focal length.
Electronics / Electric circuit
Like any CNC machines, this laser cutter needs a brain to control all the motions, the laser intensity, the end stops… I decided to go with a Arduino uno and its CNC shield since it easy to use and there is a lot of online documentation. This is also a ferly cheap option.
A few electrical components have to be wired up in order to make to hole machine work.
To work properly, the laser tube needs a power supply with an output of 22KV DC. Depending on the CO2 tube power, a hire or lower voltage will be required.
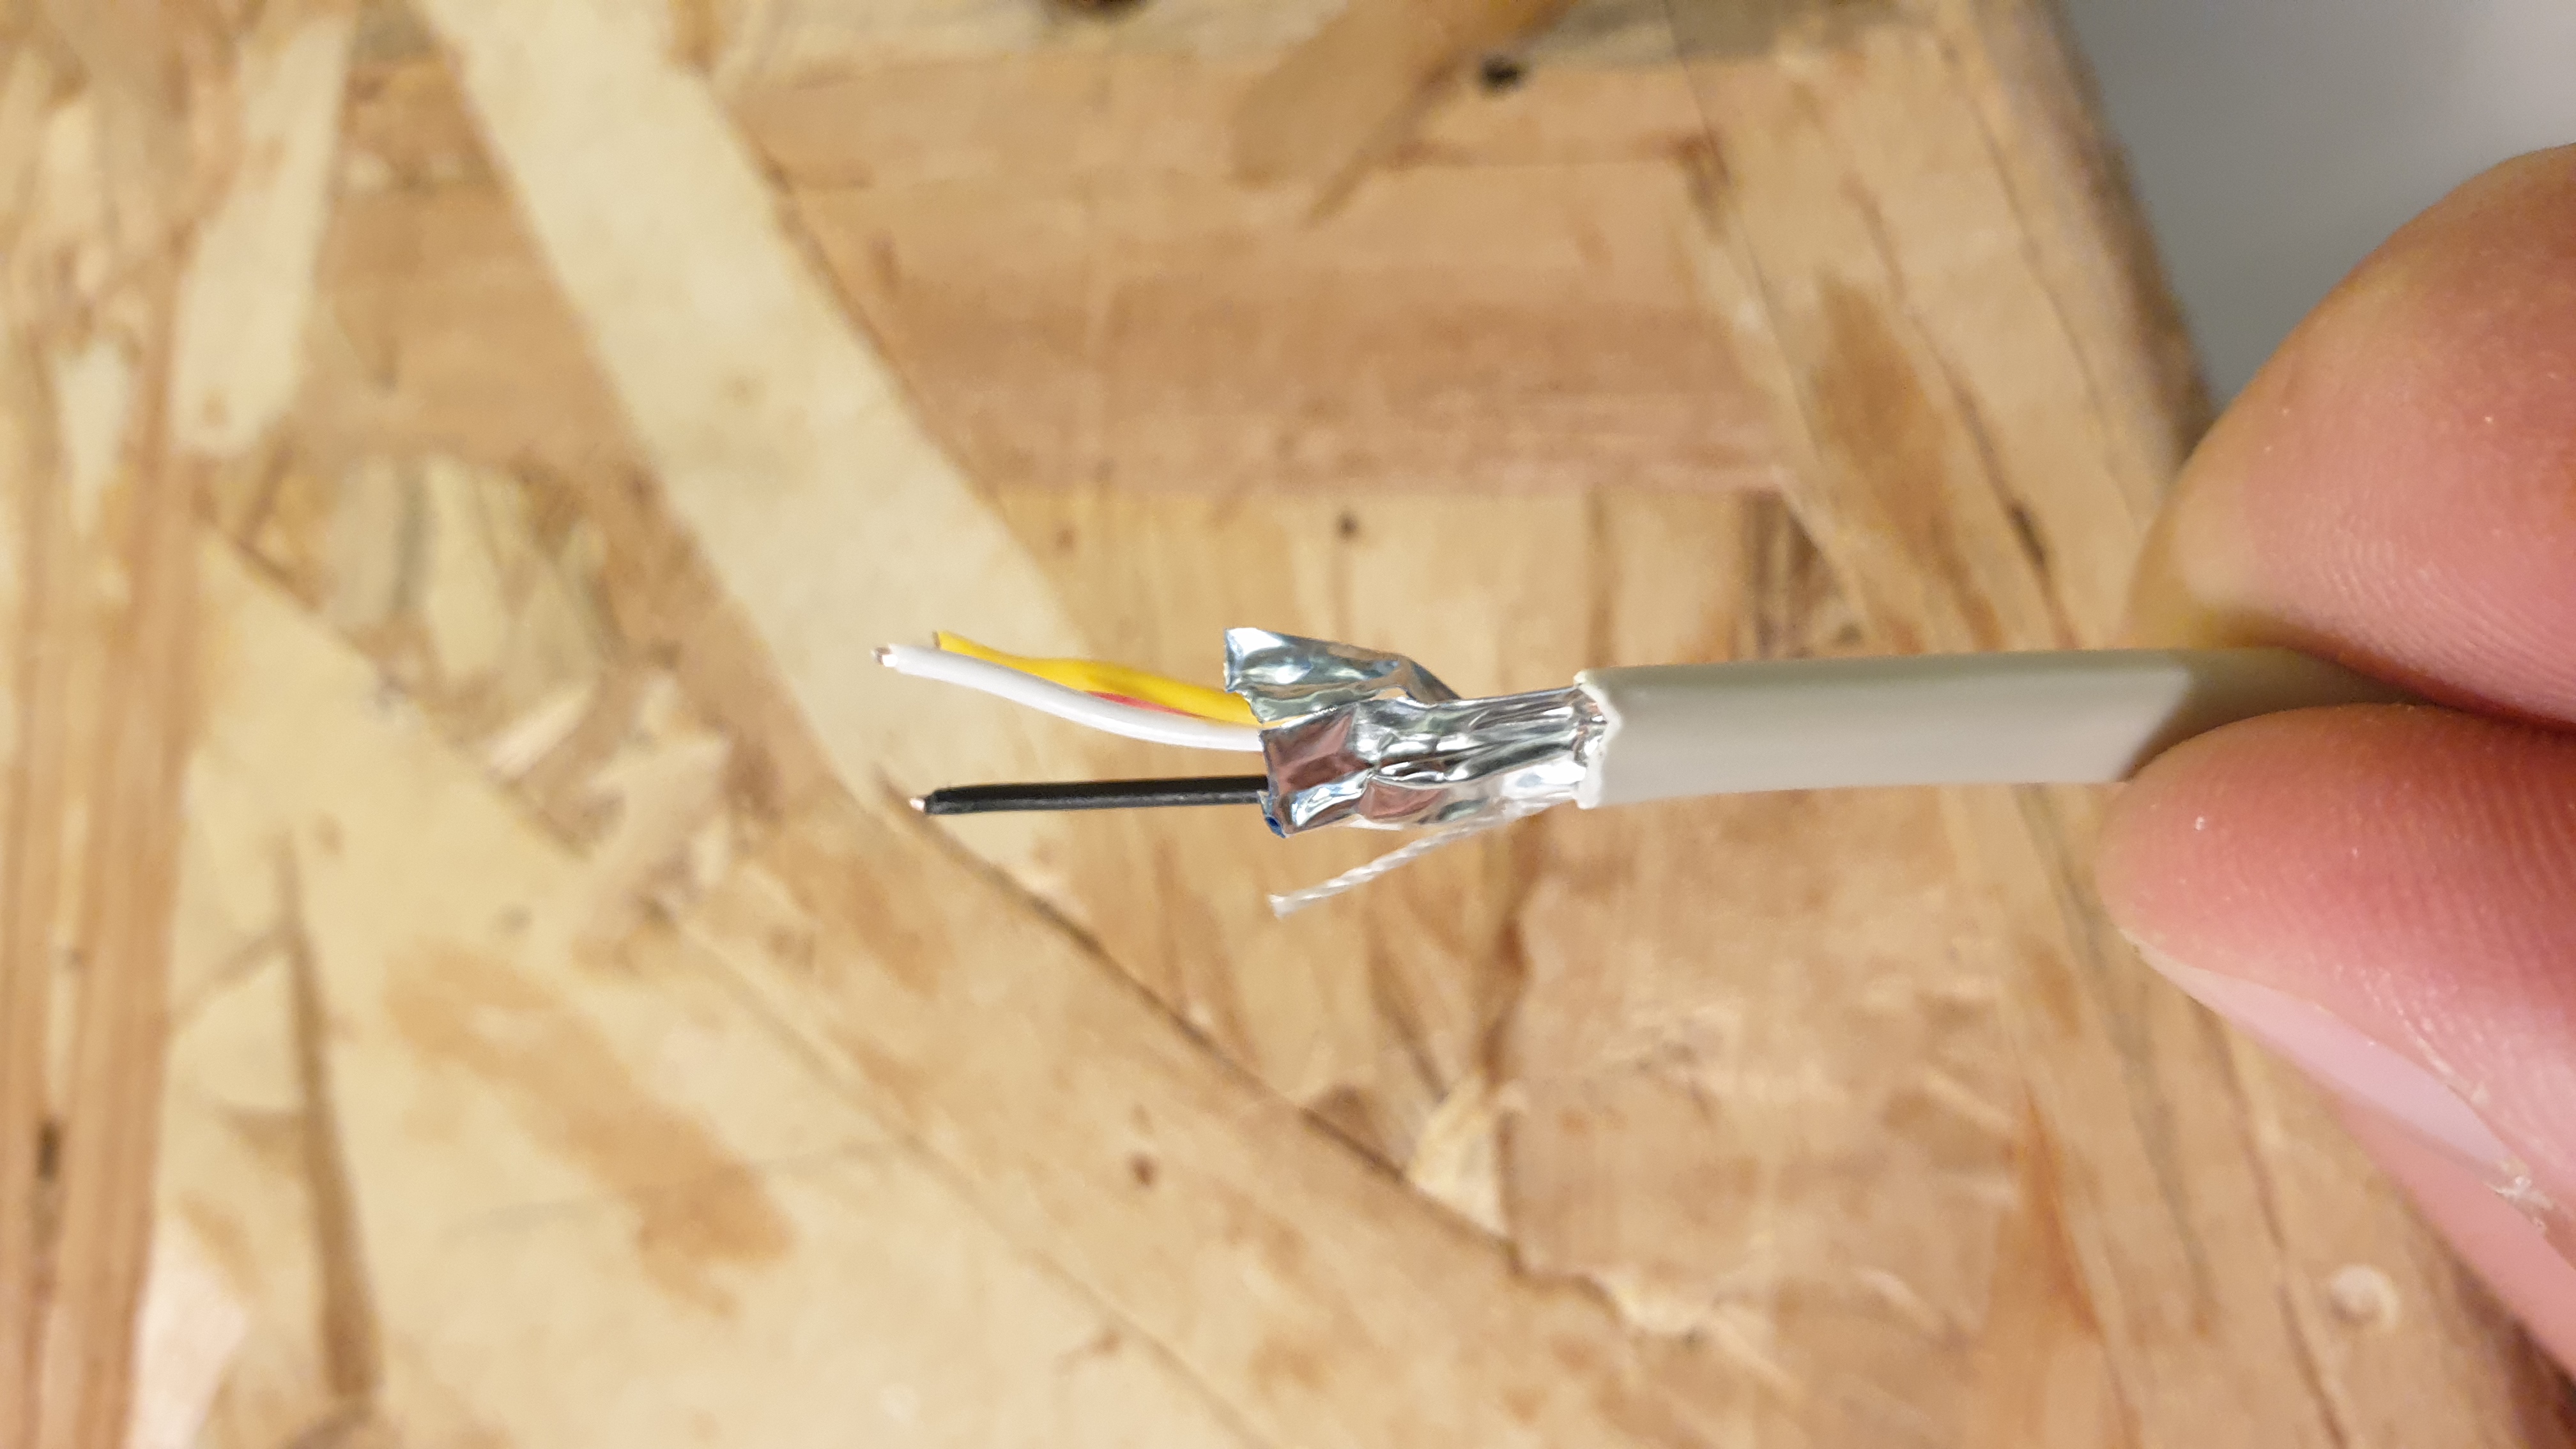
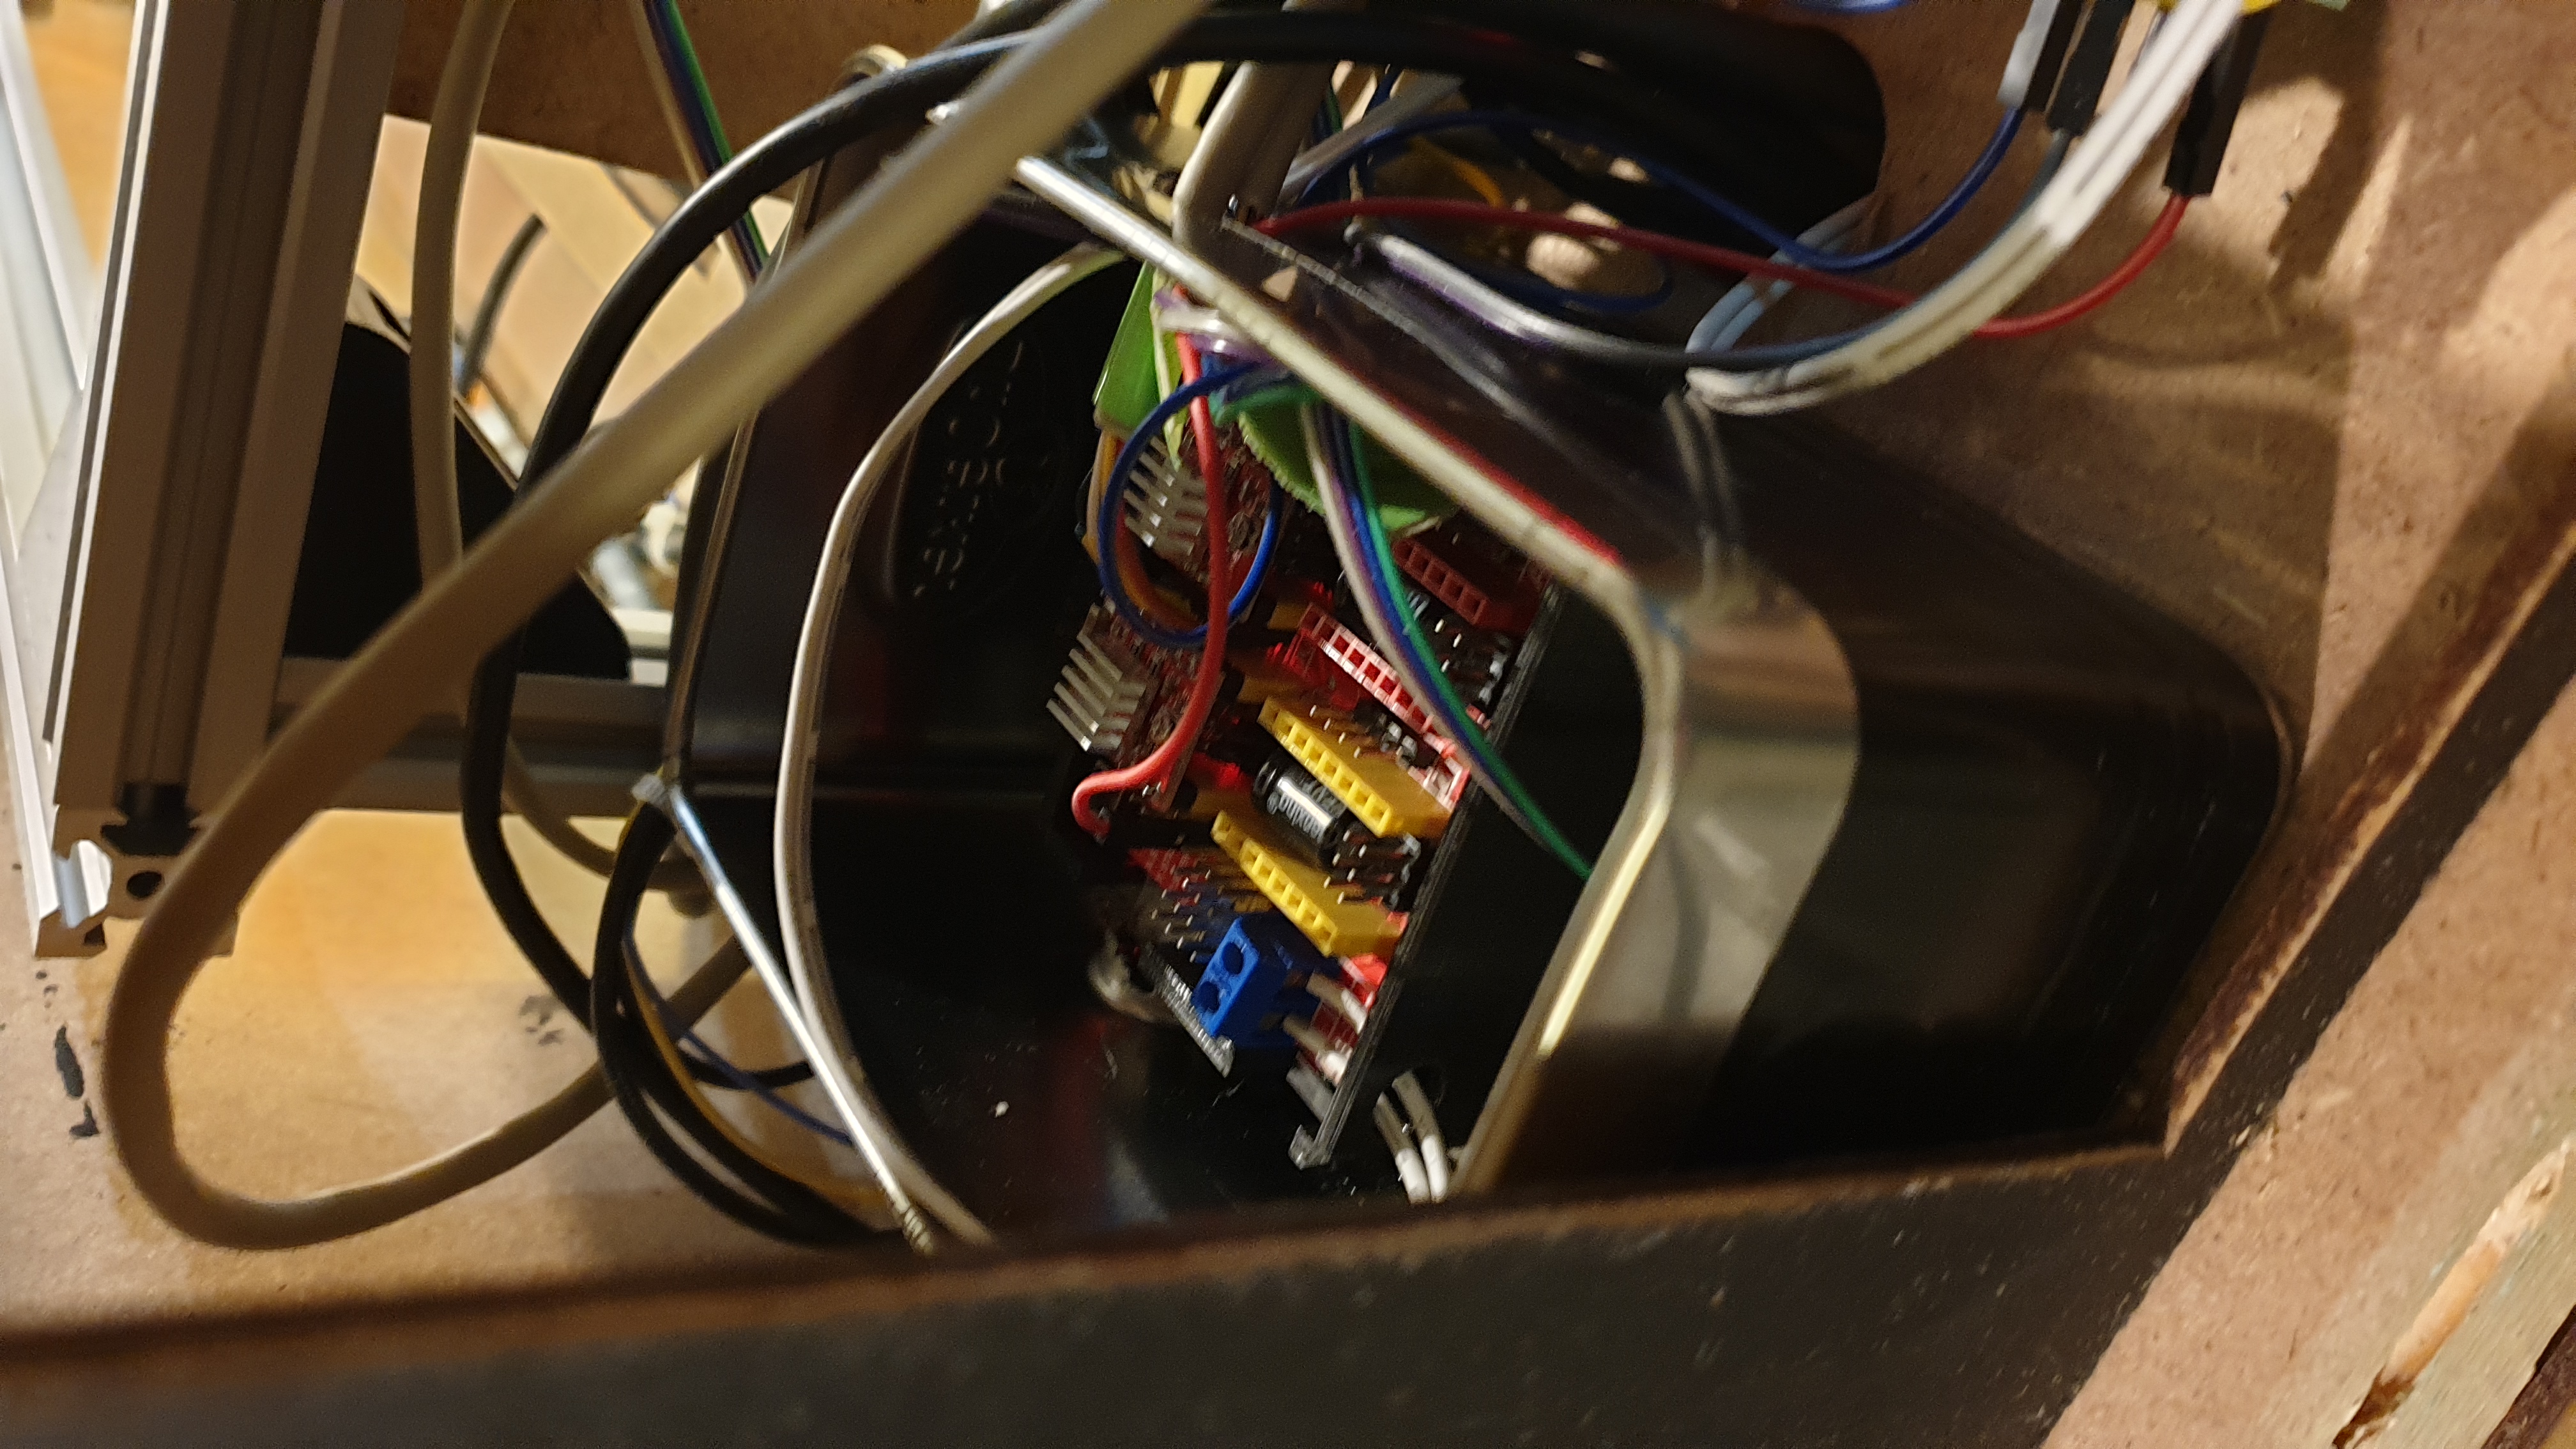
On one side we are using 5v for the Arduino and the CNC shield, and on the other side we are using 22KV to power up the laser. The high voltage tends to create interferences on the lower voltage. In my case, the signal cable going to the motor are passing near by the laser tube and it created strange motions. I had to upgrade every signal cable to shielded cables. I also put the Arduino in a steel box just in case :
As said before, the laser tube has to be cooled down. Therefore, I’m using a 12V water pump with a descent amount of suction to make sure the water flows correctly trough the pipes.
A compressed air source is also required to :
- Shoot compressed air through the nozzle to keep the smoke out
- Cool down the focus lens
- Shoot air on the part being machined to prevent any fire start
I used a regular 12V air compressor, it doesn’t need to be really power full. Membrane compressors suit the best this application since there generate less vibration and noise, but the cost is hire.
I added a 12V LED strip but this is purely ostentatious.
I also needed to wire a couple of fans up, but more on them later.
To manage all these components, I’m using several two state switches. I laser cut out my very first parts and thanks to accurate cuts and some wood glue, I fabricated the controlling panel.
Settings
The Arduino has to be programmed in order to control properly the machine. Since I’m not a code expert, I found the perfect solution on GitHub. GRBL is a code which is capable of commanding a CNC milling machine. So, with a bit of modification, it can be possible to use this code with a 2 axis machine.
I changed one line of code in the Config.h file to tell the Arduino that I’m using a 2 axis machine instead of a 3 axis :
#define HOMING_CYCLE_0 ((1<<X_AXIS)|(1<<Y_AXIS))
Instead of :
#define HOMING_CYCLE_0 ((1<<X_AXIS)|(1<<Y_AXIS)|(1<<Z_AXIS))
Once this is done, I just had to upload the main code on to the Arduino board.
The most convenient way to control the Arduino with a CNC shield is to use a software called LaserGRBL. This software is open source so there is a big amount of information and tutorials online.
LaserGRBL is transforming SVG files into Gcode. Then it sends the code line by line to the machine. A lot of settings can be programmed: auto homing cycle, motion acceleration, travel speed and so on… This software also allows to control the machine manually. I can control the X and Y motions as well as turn on the laser. It is also possible to send individual Gcode command lines thanks to the serial monitor.
Enclosure and air extraction
Security is a big concern on this project. Indeed, I will be using the laser cutter in my sleeping room and I don’t want this place to take fire or contain toxic vapes. Therefore, I designed a full enclosure made out of 3mm MDF sheets and a glass sheet.
The laser beam is redirected thanks to mirrors. If your hand crosses the beam, you might get seriously burned. At this point the enclosure makes sense, it protects the exterior environment from the beam.
While cutting, the combustion of the material can create a lot of smoke. In some cases, this smoke can be really toxic. For example, PVC contains chlorine and breathing chlorine gas causes instant death. Once again, the enclosure is protecting the exterior environment by containing the smoke.
Now that the smokes and gases are contained in the enclosure, I need to extract it. I had some 48V 80W fans laying around. I used four of them to suck all the air out thanks to a flexible pipe. Here is an image of the extracting system that can be plugged in to the machine:
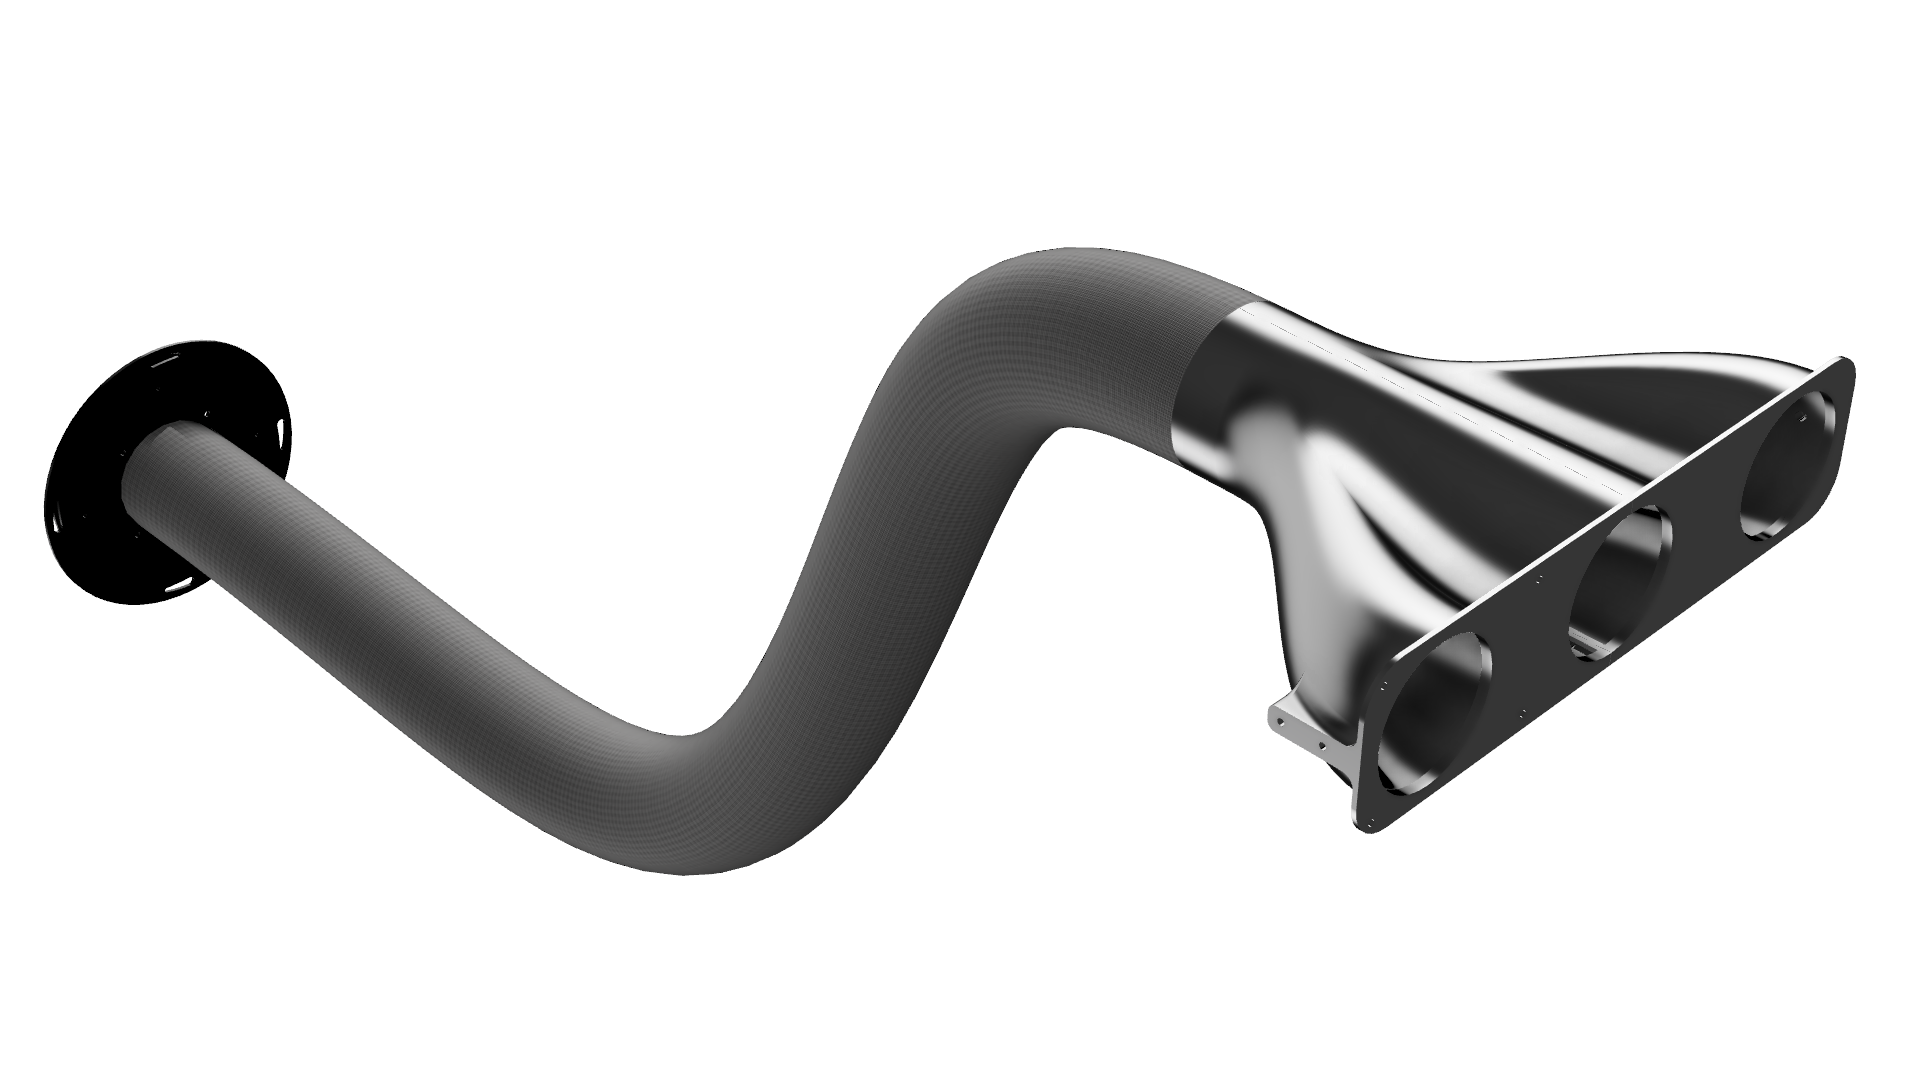
This was the last step of the machine. Now let’s have a look at the finished product.
The finished product
Here are some photos of the finished machine.


Overall, I’m happy of the result. The laser is powerful enough to cut through plywood and MDF. It also engraves grate and fast. However, little things can be upgraded in the future :
- I would like to have a 50.8mm focal length lens to be able to cut through thicker materials.
- If needed I will maybe increase the power of the laser.